Wednesday, December 28, 2011

Everyday Lips!


I hope everyone had great holidays! A happy New Year to you too! I had a wonderful Christmas with my awesome family in Indiana, went too fast for sure!! Most of the time we spend up in Indiana is eating and chatting around the kitchen table as well as reading up on tons of magazines! So since I got stuck over the holidays reading TONS of magazines so I pretty much went through every single magazine and made a list of magazine makeup suggestions sold in drugstores. I started first with a lip liner and gloss. I am always looking for a perfect, glossy lip that really pops. I like a natural pop most of the time. Natural pop to me is a nice neutral liner with a pretty, shiny, sheer gloss and I think I've found it!! The lip liner I tried was L'Oreal Infallible Lip Liner in Rose. The liner is great because it's one of those liners that you just twist instead of sharpen which I really love! The liner goes on really smooth and creamy so that means you will get a flawless liner and no mess-ups! I really like the color I think it will be really universal for everyone and any color you use!! It's only around $7.00 you definitely need to go out and get it!!! I paired it with the Rimmel Stay Gloss in Non-Stop Glamour. It'll set you back about $8.00. It goes on so creamy and not sticky at all!! I hate goopy, sticky gloss....gross!!! This one is a beautiful neutral gloss with a tiny splash of color and lots of shimmer which I love!!! I feel like the gloss has a multi-faceted look like there are bits of shimmer throughout the gloss so that really makes your lips pop without looking like you're trying too hard. This is my recipe for a neutral pop-slightly darker than lip color lip liner and a nice shimmery lip gloss and viola!! Try these two out together as a pair they are amazing!!!

Sunday, December 18, 2011

Hair Raising Secrets!


Hi!! Ok I want to write about hair! Here are a few little supplements and treatments I do to keep my hair strong. I really love long, beautiful, strong hair and that's what I want myself so here are a few little tips and tricks.

Phyto Phytophanere Dietary Supplements-These little beauties will help fortify your hair. Two of these little natural elements will provide you with nourishing vitamins, essential fatty acids and antioxidants to help your hair grow, strengthen nails, help your skin look radiant, and lengthen your lashes! Not only do these pills add density and shine to your hair, but your overall health will be great!
These little babies you take once a day and I truly believe these have helped my hair a ton! I take two in the morning as well as taking folic acid. Now, I have no idea if folic acid really helps your hair but my grandpa, Pops, takes folic acid every day he told me if I wanted thick, strong hair when I get older then I needed to take folic acid every day. So, like I said I don't know if it does anything but my grandpa has an amazing head of hair so I'm going to take it! Not to mention, if it doesn't really help your hair who cares it's still good for your health! So I take those 2 in the morning. I also take a swig of Carlson's Cod Liver Oil. I get the lemon flavored because let's be honest, you just need to cover up the cod liver oil flavor. So I take a very small sip of that, that's all you need anyways.Cod Liver Oil gives a ton of health benefits as well as gives you great skin and hair. At night I take Biotin which is really great for your hair as well. I think these supplements really help keep your hair and skin tip-top.

Another thing I do is use Phyto's Phytoplleine Universal Elixir. This is a blend of 100% essential oils that will help stimulate and purify the scalp. This blend of essential oils will help energize the hair and will balance your scalp so I truly believe this product is great for everyone. If you have oily hair, this will balance the oil production in your hair, dry hair-this will help produce more oil to balance, itchy, dry scalp-it helps for that, this product helps with it all! This product also helps with thinning hair if that's what you're worried about! All you have to do is put this in your hair, which this bottle has a very easy applicator, leave it on for 20 minutes and then wash your hair like normal. Your hair will smell amazing as well!!!

www.phyto-usa.com

Sunday, December 11, 2011

The good and the bad, in products that is


I usually use a yellow concealer to help lighten the dark circles and redness around my nose. I have tried and LOVED the Cover Girl Simply Ageless Anti-aging yellow corrector. I really love it! But it can be a little pricey for drug store brands, it usually runs around $10 or so. But it goes on really creamy and smooth and doesn't dry out your skin and really gives a flawless look to your makeup application. I ran out so I went without the yellow corrector for quite a while but I realized I really needed the yellow corrector. I just didn't have that flawless complexion that I was going for without it. So-I tried this one out: Maybelline Cover Stick Concealer in Yellow. It's about $3.50 and it's really not that great. :( I wish a $3.50 concealer stick was amazing but it's just too drying. I have to do a lot of maneuvering to make my application not look too drying. I really like a flawless finish on the concealer and foundation and this does not cover, conceal or give an even finish that I like. So pass on this one! The concealer that I do use is amazing though! I have written about it before it's the Maybelline Fit Concealer. It is amazing!!!

The other product I tried out lately was the N.Y.C. brow powder and gel. It's called Browser Brush-on Brow kit and it's only about $3.95. It has the brow powder and a gel to hold your brows in place and the color looks amazing on and the gel keeps everything in place.
I have tired a few different brow pencils and I just can't do pencils. I am too heavy-handed and the brows don't look natural. I think it is so much easier to use a brow powder, I know it seems like it's more intimidating to use a powder over a pencil but it's so much easier! Powders last a lot longer and it gives more of a natural brow look! A lot of the other colors I use drugstore brand or higher-end brands are hard to find a good color to match your brows but this one isn't too red or orange and it really is a beautiful natural look! Try it out it's so cheap, will last a long time, give you the pop you need for your face and will keep your brows in place!

Wednesday, October 26, 2011

New Mascara of the Month!


So, I have decided to start writing about a mascara of the month because mascara is definitely my favorite beauty product so I really love trying new mascaras out! I have written so many blogs and reviews on mascaras I don't even want to go back and look through my blogs and see how many times I've reviewed them. I have a few that I have loved, L'Oreal Voluminous but it's one of those that when you first open it the mascara is really thick and gooey and it's kinda hard to apply but once you get a little air in the tube it thickens up the mixture and helps it not go on as clumpy. That's kinda the same with the Tarte Lights, Camera, Lashes and the Too Faced Lash Injection so that's just a little warning. Once there is a little air that gets in the tube it applies much better!! This mascara that I just tried was amazing from the get-go! Right when you open it the application is so amazing from the first try! I was really amazed at the length that the mascara adds as well! It doesn't smudge, doesn't flake all over the place, doens't make your eyes itch, it looks good all day long as well! I am so obsessed with this mascara and for $6 you can't beat it! Everything that I want in a mascara (length, definition, no clumps, volume, curl) is in this tube of mascara. Love it, love it, love it!


Sunday, October 23, 2011

Brows!


Ok. It has been a long time since I have written but I'm back and ready to blog! I went on my honeymoon finally, 9 months delayed but so worth the wait!! I packed all my makeup from my last blog that I wrote about, the 5 minute makeup, I used all that makeup because all those light, cream-based pieces are the best to use in the hot, beachy weather. The Nars Multiples I used for my cheeks, lips and eyes stayed on amazingly and didn't weigh me down in that hot, humid weather. If you ever have to fly or you're going somewhere where you don't want to have to bring a ton of makeup then that 5 minute makeup blog is a guide for you. You will still have a full makeup look but it's just a few pieces. The one makeup piece I forgot was my brow pencil!!! How could I do that??? Brows are huge for me and I forgot a brow pencil! I ran out to the nearest Walgreens and grabbed a brow pencil from Maybeline. This is Maybeline Expert Eyes Brow pencil. You get 2 in each pack the only problem is the color is awful!!! The pencil is so hard you can barely even draw this on and it just looks really fake. I purchased the brunette one and it looked red almost. So, let's no
t waste our money on that one ok?

Now I'm back to my beloved Vanity Mark Dark Chocolate Brow Powder. I really like powders more. They are so much easier to apply and they last a very long time. These are about $18 but I have had mine for at least a year, if not longer.
Here is a good cheap find for you! Everyone loves the Maybeline Great Lash Mascara, that hot pink and green tube. I had to try it because it really is a huge favorite among a lot of different magazines and I just don't get it. I might need to try it again but I just really didn't like it. But-I did notice that the Maybeline Great Lash has a clear mascara that they just came out with and I LOVE it!! I don't use it for my lashes though. I use it as a brow gel to keep my little caterpillars in place. I wax and shape brows for a living so I know those suckers don't grow exactly how you need them to. Some people's brows grow down in certain sections, sideways, straight up, they grow all over the place and you usually do not need to wax off that area because it will completely mess up the great, full brow arch that you have so I always suggest buying a brow gel. I hate having to sell a gel that they are only going to use on their brows because it usually runs about $14-$16 dollars but this one doesn't! It was about $5 and I can deal with that! I will pencil in my brows with my Vanity Mark brow powder then I will use the Maybeline Great Lash Clear Mascara and just brush it right over my brows in the shape and arch that I want. This will keep all the brows tame and almost act like a little brow hairspray for you. It's amazing!


Monday, September 19, 2011

5 minute makeup plan!

Hello! Here is a post how to apply your makeup in 5 minutes! Yes-you can do it in 5 minutes! I tend to do my makeup quite fast but the one thing that takes up a lot of time for me is eye makeup application and liner as well. So-I have found a small amount of products that will take only 5 minutes to apply and this stuff will stay on ALL day! I'm not kidding! I have been trying this application technique out for about a week now and even through my busiest days at work my liner, mascara and eye shadow didn't budge! My good friends Laura and Travis bought me a web cam for my birthday so I will post a video on my application of the 5 minute makeup once I get them over here and they can show me how to upload it!


First I start out with a moisturizer. Even when I use a tinted moisturizer as my foundation I still like to put a moisturizer on first because I like that extra hydration throughout the day and it also gives your skin this beautiful glow. I like to use the CoverGirl NatureLuxe Tinted Moisturizer, it's about $9 and it is amazing!! I really can't try anything else right now I'm so in love with it! All I do is apply this all over the face, neck if you want to, I do.

Next I use that fantastic concealer that I also cannot live without! I have yet to try another concealer since I tried this one because it is really creamy and has fantastic coverage so a little goes a long way and it lasts all day without going flaky, crepey or melting off. I apply this under the eyes, around the nose and around the mouth and chin. A little goes a long way!! This little gem is only $5.

After I apply a light amount of concealer I use one of my more expensive but SO totally worth it makeup pieces! I promise you this piece of makeup is worth every dime!! I have two of these multiples in different colors because they are so amazing and versatile. I have this one I'm going to talk about called Orgasm and the other color I have is called Maldives. They are called multiples because you can use this cream-based stick as a cheek color, eye shadow and lip color as well! So see, it's definitely worth every penny! I will give a word of warning----do not use over a powder unless you use a brush. If you apply this cream stick directly onto the cheeks it will take off your powder color and you will look splotchy. So-if you are doing exactly the steps I'm doing here you can apply it directly onto the cheek but if you throw a powder on top of your face after your concealer then use a foundation brush to apply this color on your cheeks. I apply this multiple stick on the apples of the cheek and go up the cheek bone and stop when you are just below your eyes. Barely blend this, it will go on so sheer and light that you really won't need to blend. This is my little gem:

Nars Multiple in Orgasm, yes that's the name, $39
This color is written up in all sorts of magazines because it is so universal. Any beauty editor can write about this blush color and know that it is going to look good on everyone. This is a beautiful peachy/pink with a beautiful shimmer to really accentuate the cheekbones so it will make those pop and give you a beautiful glow!

The next quick step is throw a little eye primer on. I have written about this one before but it is amazing! It helps keep any eye makeup you put on to stay on all day and it gives you this beautiful even shimmer on the lids if that's all you want to wear!

Too Faced Shadow Insurance in Candlelight $18
A little goes a long way on this product as well. If this is the only color you want on your eyes go for it. I apply this from the last line all the way up to the brow. It's a beautiful shimmery nude color that will wake up your eyes but give a nice shimmer too. I also hit a little right near the tear ducts just to make your eyes pop. This primer also gives a really nice highlight for right under the brow so that's why I simply apply this all over the lid. Now-if you want to stop here you can and give a really light, natural eye look. If you want to do that then skip down to the liner portion, if you want a little extra color read on...

Okay, if you want a little extra color this step is quick, easy and it will last ALL day!!

Jemma Kidd Vintage Gold Liner $20

Yes, this is a little bit pricier than what I normally write about but this is also another multi-purpose piece. You can line your eyes with this and I'm telling you these babies don't move!!! You can also draw this all over the lid and smudge to give this beautiful shimmery, copper shadow that will stay on all day! That is what I did on Saturday and it looked amazing all day! These liners are the best in the beauty industry!!

Next step is liner. I would line this color on the inner rims of the top lid and do on the lash line for a really natural look and that's all I would do. The liner I would use is:

Once again, Jemma Kidd Liner in Zodiac, $20

Yes, I know these items I have written about are a little pricey, but I am here to help you not waste your money so yes, there are sometimes I'm going to find a piece that is so fabulous that it is worth the money so I promise you, the multiple and these 2 liners are so worth it!!!

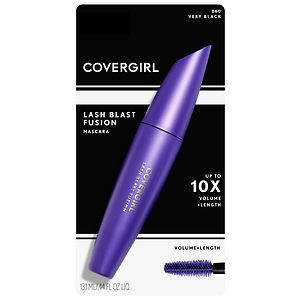
Next step would be throw on a little mascara
I have been using this one lately. It's pretty good. I have been getting a lot of compliments on my lashes lately and the only thing I'm doing is using this mascara so something must be right!

CoverGirl Lash Blast Fusion $8

Finishing touch: my new favorite lip stain

Revlon Just Bitten Lip stain in Desire, $7

This 5 minute look might take a little longer at first but once you get the swing of it you will be ready to go in no time!! I really think this look will look right on for the fall beauty trends as well. My prediction for the fall beauty look will be really neutral and dewy with a pop of lip color. This is exactly what you're going to get when you do this makeup look!!! The blush color is beautiful and shimmery, the eyes are very neutral but your eyes will pop when you line the inner rims of your eyelids with that zodiac black pencil and throw a little mascara on and that pop of lip color I think you will look amazing!!! Video to come soon!!


Saturday, September 10, 2011

Bitten!!

Okay, I have just tried a new lip stain/gloss that I just love!! It's super affordable and easier to get a hold of since this one is sold at all your local drugstores. The price is much more appealing than my other tried and true lip stain (I'll write about this one too) but I will compare the differences here.


This one here is Revlon Just Bitten-for some reason I have always loved a really natural lip on myself and all of a sudden I have been dying for a great, bold lip so when I was at Target this week I decided to give this one a try. I know there are a bunch of different lip stains out there now like the Covergirl brand as well but what drew me to this one was that there is a lip stain on one end and a gloss on the other. The lip stain is just like a marker, which I can recall using markers as lipstick as a child, but this marker is easy to apply and it really will adhere to your lips and stay on. You have to make sure that you apply it very evenly and neatly because if you hit outside your lip, most likely it's not coming off for a while. This one does not stay on for hours and hours but I will say it stays on great for a $6.00 lip stain and the balm/gloss that comes with it keeps your lips hydrated where most lip stains dry out your lips like crazy! So-that is why I picked the Revlon brand over the other ones, the multi-purpose use. If you buy a stain strictly with no other hydration, you're going to hate it! So that's why I love this one. Like I said, the life of it isn't as long as some lip stains, but I was pleased and by the time I was ready to re-apply that yummy balm on the other end it was time to re-apply the stain so it worked out nicely. I first bought Desire and I liked it so much I went back and got Victorian, Gothic, Crave and Passion. These are all bold pops of color that I just love and are going to be so popular for fall!! I love these and for $6 you can't beat it!!!


Here is the higher-end option that I do love and the staying power is unbeatable!!! This is Tarte hydrating lip stains. They have different finishes, which most don't. There is a matte finish, a gloss finish and a shimmer finish. I really love these because this is a great starter lip stain. Lip stains are amazing and they are a bold look but they don't have a heavy look like lipsticks do. Lip stains are usually just a watery, liquid that you apply directly to the lips and your lips just absorb it up and the color stays on for a long, long time! So, most lip stains are a bold color but they really look just like your lips so in a way it still gives you a great natural look. Unlike most lip stains Tarte's gives you different sheen's which no other line can be compared to. I love that these stains are also hydrating where in my previous paragraph I wrote about most stains being pretty drying, which they are. This one does not have a gloss/balm on the other end like the Revlon one does, this is just a two-in-one that you don't need it. I really like these and the color does stay on for a very long time and the longer they are on the bolder the color gets! I use these lip stains every time I do weddings for photo shoots because you rarely have to think about re-applying which is really nice. The price is a little steeper, but if you are a huge lover of bold lips and are looking for something really spectacular try out these little beauties!! $24 at the cosmetic market!


Monday, August 22, 2011

Easy access Mineral Foundation

CoverGirl TruBlend Mineral Foundation
$7.50

Okay, I have been trying out a new mineral foundation after one of my friends asked my opinion on a cheaper, easier to find mineral makeup comparable to Bare Escentuals. I have tried a few different mineral makeup foundations and most tend to feel a little too heavy and really get into the pores which just looks awful. When I went to Target to try and pick out a new mineral makeup to try I really wanted to find an affordable one, and let's be honest some drug store makeup brands are getting just as expensive as some department store brands and higher end makeup brands. I also wanted to find one that was easy to pick out color wise. I have been in the makeup artistry business for many years and finding the right foundation is pretty easy now but I know how overwhelming it can be trying to find the right shade for your skin. So, when I was trying to find one to try out I decided that ease of color matching would be very important too. Usually when you use a mineral foundation a lot of the foundation colors can really match a wide range of skin tones. I decided to pick CoverGirl TruBlend Mineral Loose Powder. There are only 4 colors to choose from which makes finding your shade very easy!!! I used it and really enjoyed the feel of it. Like I said a lot of mineral foundations tend to go on really heavy and just sit right on top of your skin and that makes for a very heavy, not natural look, especially if you have large pores or uneven skin. I have just started to like Bare Escentuals but it does give a heavy coverage (that's why it's taken me so long to really like it). Bare Escentuals foundations are great and they won't clog your pores but they can sometimes go on very thick and look and feel very heavy. You really have to use very little and really spread the foundation evenly all over the face, very little goes a long way.
I tried out the CoverGirl foundation and I really liked it. The one main change with this one over the Bare Escentuals is that the CoverGirl foundation definitely does not give full coverage like the Bare Escentuals brand. But-overall I was really pleased. The application of the powder and the feel and stay of the makeup was great! I really like it and I will definitely be using this again. I always put mineral foundation on first, then apply concealer on top of the mineral foundation, throw a tiny bit more foundation on top all over the face and really sealing where I put concealer and then throwing a loose translucent powder or mineral veil on top of the foundation just to set everything.
To find a drugstore brand "mineral veil" I would really go for any loose translucent powder. I really like Coty Airspun Translucent Loose Powder, it's about $7.99. Very little bit will go a long way!!! Some days I will just throw on moisturizer, put on some concealer and then throw on some of this translucent loose powder to go a little lighter on the coverage and it does a great job!
Coty Airspun Translucent Loose Powder
$7.99

***The main key to application on any type of makeup is brushes and that is one thing I will not skimp on!! If you purchase a nice group of brushes you will not be disappointed and it will completely change your outlook on all sorts of makeup brands so definitely go get a great pair of brushes for great application!!***

Monday, August 15, 2011

Mascara Update!

Ok, life gets in the way of things some time and I just needed to take care of a few things over the past few weeks so I had to take some time off from blogging but I'm back and ready to write!!!

CoverGirl Natureluxe Mascara
Any drug store $8.50

I have really been pleased with the Covergirl Natureluxe products-love the tinted moisturizer and the balm gloss so I was SO excited to give their mascara a try!! I went to Indiana a couple of weeks ago to spend some time with my amazing family and relax. It was much needed and I had a great time but, my allergies were KILLING me!!! Every day my mascara and eye liner were completely worn off my eyes and all over my face from me scratching at my eyes all day! I finally gave up the old mascara bottle and thought, "Now is the time to get a new mascara to blog about!!" So-I purchased the Covergirl Naturelux mascara! I had been wanting to buy this mascara for a long time since I was such a fan of the other Naturelux products. Well...it's just ok. I hate to say that but this is the thing-this mascara did a fantastic job for not irritating my eyes which this mascara would be fantastic for people which major eye sensitivities. But for me, usually I don't have eye sensitivities, except going to Indiana, the land of corn and blooming flowers. So normally mascara not running and irritating my eyes aren't really a main problem for me, but if you have an issue with mascara irritating your eyes or not staying on well-this one might be the one for you! I personally like a mascara that makes my eyes pop, I mean I want HUGE lashes!! This mascara here does not give that to you so I was a little bummed about that but one bonus is that there is no crap in this mascara. A lot of mascaras can be irritating and harsh and this one has natural beeswax instead of funky synthetics in it so that is a bonus. So just to add to the confusion of if this mascara is good or not, I just can't say. It definitely has some pros like the natural ingredients, gentle of sensitive eyes and does not rub off. But, it does have some cons, now really these cons are completely my personal opinion so really these cons aren't really major cons, just things I don't like :) Cons-does not add length or volume. I guess that's about the only con! I really love the mascara wand, it's fantastic. It really helps you apply the mascara evenly and no clumps!!

So at first when I starting writing this I thought it was going to sound anti-covergirl naturelux mascara but after really thinking about what works with it and what doesn't I guess the pros outweigh the cons! But-if you are looking for a thick, volumizing mascara this is not the one for you!!! But if you're curious and you just are really wanting to try it- go for it!! I think you will like it!

Sunday, July 3, 2011

Summer Must Have!!!

Ok, so a while ago my aunt Vikki, and one of my biggest supporters who I definitely don't thank her enough for that, gave me this piece of makeup to try for the summer. Well one day I was meeting her and my mom at Cheesecake Factory and we were sitting outside on the patio and Vikki starts talking about this new product that I need to try and she pulls it out of her purse. All I see is this ADORABLE packaging!!! So that's bonus points already. Packaging is so important but it's what's on the inside that counts!! So she hands me this cute little bright orange compact. I am looking over the product and it is just so cute. There is this amazing hot pink application sponge which is really good quality, which I usually just throw away all the application products in any makeup. So-this application sponge is really nice and you can apply the powder dry or wet. If you get the sponge damp it does and amazing job! I use it even with other makeup products as well!
Okay so this is why I have waited until now to write about this product, look at these amazing benefits that this product offers and all you have to do is put it on your skin!!

-This powder has a SPF of 50!!! This will give you UVA/UVB protection as well as great coverage!! I also like the coverage because it's a nice matte finish so it will help with the oily, shiny skin we get in the summer time.
-This powder as has SPF boosters and it is a mineral-based sunscreen that does not break me out!!
-Contains antioxidants!!! This will help prevent future UV damage and signs of aging!
-Contains licorice extract and tomato derivatives to help naturally brighten the skin and lighten the damage of age spots from the sun!

This product is a No-Brainer!!! All you do is throw it on top of your foundation and concealer and you're set makeup and skincare wise!! Now of course I always promote people putting on a regular SPF as well but if you're really prone to breaking out with sun block then this might work best for you. I really enjoy and the coverage is very sheer so just do your skin a favor and throw it on your face before you hit the front door!

Healthy Wear™ SPF 50 Powder Foundation
www.physiciansformula.com
$14.95 at all drug stores

Friday, July 1, 2011

MakeUp How-To's!!

Ok, so my last blog I wrote about was my new favorite thrifty concealer!!! I'm still loving it and now I am going to post you step-by-step directions and pictures of my every day makeup looK
First: This is me without makeup----Yikes!!


This picture below is after I applied Bare Escentuals Loose Mineral Powder in Fairly Medium-as you can see it's really helped even out my skin tone, but still super pasty and one dimensional. i really like to match my foundation exactly to my skin tone so with just the foundation on your skin can look really one dimensional-but that's where the next few steps help!


This picture below shows you where I applied my new favorite concealer, Maybelline Fit! This picture is kind of small but as you can see, I have applied my concealer in a triangle shape under my eye. This shape should go up the side of the nose, under the eye and at the edge of the eye you will bring it diagonally back to the bottom side of the nose. I do concealer around the laugh lines, on my chin, around the edges of my nose and in between my brows. I blend the concealer all over lightly and this is what it looks like:


Look how much concealer helps!!! Thank God for that stuff!! After I blend the concealer I put Feather Light Mineral Veil on from Bare Escentuals as you can see below. My complexion is looking pretty pasty and one dimensional.


The point of foundation and concealer is to really even out your skin and give you that flawless skin. I love a nice flawless face but I can't live just like this- I MUST add bronzer to my face!! If you aren't a fan of bronzer I would just throw on some finishing powder and move right to blush. I for one, cannot live without bronzer and this picture below will show you what a difference bronzer makes!!


What a difference!!!! Now that's what I am talking about!! I apply a light, somewhat shimmery bronzer all over my face. It's not really glittery, it just has a nice dewy sheen to it and I really like that look!! Some people prefer a more matte appearance and that's perfectly fine too. I prefer both so for all over my face I use the shimmery bronzer and to contour I use the matte one. The bronzer I used all over my face was Too Faced in Sunny Bunny.

This picture shows me applying the matte bronzer right in the hollows of my cheeks and doing a small "c" at the end of my brows on my forehead. Small step but big results!!! The matte bronzer I used was Rimmel Natural Bronzer in Sun Bronze.

This picture shows my blush step.

This picture is where I just put a darker, matte blush slightly above where I put my matte bronzer. This adds to that contoured, model look and really helps make your cheekbones pop!! The blush I used is Therapy Systems Caramel Sugar. Then I apply a pink blush right on the apples of the cheek bone and I bring it diagonally all the way up to the corner of my eye. Of course I keep distance from the under eye, but once I hit the blush high enough to my eye that's when I know I have gone high enough. I feel like dragging the blush as high as the eye will really help lift your face and really get those cheekbones popping!! This pink blush I used today was Catalina from Cargo.


This picture is my applying a highlighting powder right over the apples of my cheeks and taking it right on the boarder of the top of my cheek right under my eye skin. Just keep the highlighter right on the upper cheekbones! This subdues the bright color of the blush and really help add a pretty glow to your skin.

Ok, this is my eyes just with primer on them. I usually don't use primer on a regular basis but I wanted to show you how even primer makes your eyelids so if you wanted just to look awake and have a quick and easy makeup routine this primer would do the trick. If you have issues with your shadow creasing this primer is your solution! This primer I'm using here is Too Faced Shadow Insurance in Candlelight.


My first step in applying eye shadow is using a really light, nude-white color all over the eye from the lash line to the brows. This really help open up your eyes and I like applying a neutral color like this all over because it really helps all the other colors go on easier. This eye shadow is Bare Escentuals Demure.


This picture is after I added a shimmery brown shadow right in the crease of the eye. All you do is go right in the crease and do a "c" shape back and forth and on the corner of the eye I will help blend it with a sideways "v" shape just to help blend the color. I also get a stiffer brush and line under the lower lash just to add a little color and drama to this look. Plus-I hate when eye liner is very harsh and you can obviously see the dark, black line...yuck! So adding a little eye shadow under the lower lash line will help ease the harshness of liner. This eye shadow I used was MAC in Tempting.


This is a step that if you want to add a little drama and darkness you can. If not, you can just apply that dark brown on the crease like the last step and jump right into the liner. If you do want a little more color then you can add a little darker color on the outer edges of the eye. This color is Mambo by Paula Dorf. I really focus on the outer edge of the eye and I really try not to apply it all over the lid. I like to leave it lighter on the inner corners. I love Mambo by Paula Dorf because it's black/brown with flecks of gold in it, it's perfect!!


After I apply the Mambo shadow I go back over the crease with the MAC color one more time to just even out everything and help it blend. I usually grab a lighter/highlight color and put right in the inner corners of my eye and bring it up to under my brow. This really helps highlight and open the eyes up. I used the Demure color for this.


After I am done with the eye shadow, I use the Mambo eye shadow color and line my eyes with it. Just have a good stiff, flat liner brush and you can line your eyes with any shadow. I first like to line my eyes with eye shadow first then I do a pencil or liquid liner, whichever I choose to do that day.


Next I lined my eyes with a pencil liner. The one I used was Wet 'N Wild black pencil liner. When I line my eyes I line the entire upper lid and do a slight curve at the end for a "cat eye" look. I do not line the entire bottom of my eye I only do about a quarter of the bottom and connect the bottom liner to the top curved up part. It really helps give your eyes this amazing almond shape.


This is the makeup must-have MASCARA!! I absolutely love mascara it's my favorite thing! This mascara I used is Too Faced Lash Injection. This mascara is amazing!! I love it because it creates tubes around your lashes and it's waterproof!! There are a few mascaras that create tubes around your lashes and are waterproof but they aren't thickening. That's why I never liked them! I love a thickening mascara and this is both wrapped up in one bottle!! I love it!


OKAY!!! I LEFT OFF THE MOST IMPORTANT STEP TO PROVE A POINT!!!

Brows!!

This is my finished look without brow powder


This is one brow with powder one with none


how crazy is that????? adding brow powder instantly gives you a face lift!! It completely changes the entire look and really finishes the entire look!

Here is the finished look with both brows done!!


Last but not least!! Lips!!


This picture is me with this fantastic lip liner called Reverse Lip Liner. It helps keep your lipstick from running but it also helps your lips look bigger!! It looks pretty white when you first apply it, that's why it looks so light in the picture but I wanted to show you where I put it, but once you draw it on you just blend a little bit and you can barely even tell!


See? That's the Reverse Lip Liner blended.


Next I applied this cheap liner from Target. The line is called Boots No. 7 and the color is nude. I just applied this around the edge of the lips.


This fantastic little color is from Cover Girl Lipslicks in Cutie. I love this color!!! These Cover Girl Lipslicks are amazing!! I love them!


YAY!!!!! All done!!! Thank God for makeup eh??? Here is a picture of the final product without me wearing a turban :)


All done!!! There ya go!! One day I'll figure out how to make a video so I won't have to do a makeup slide show! I hope this helps!!